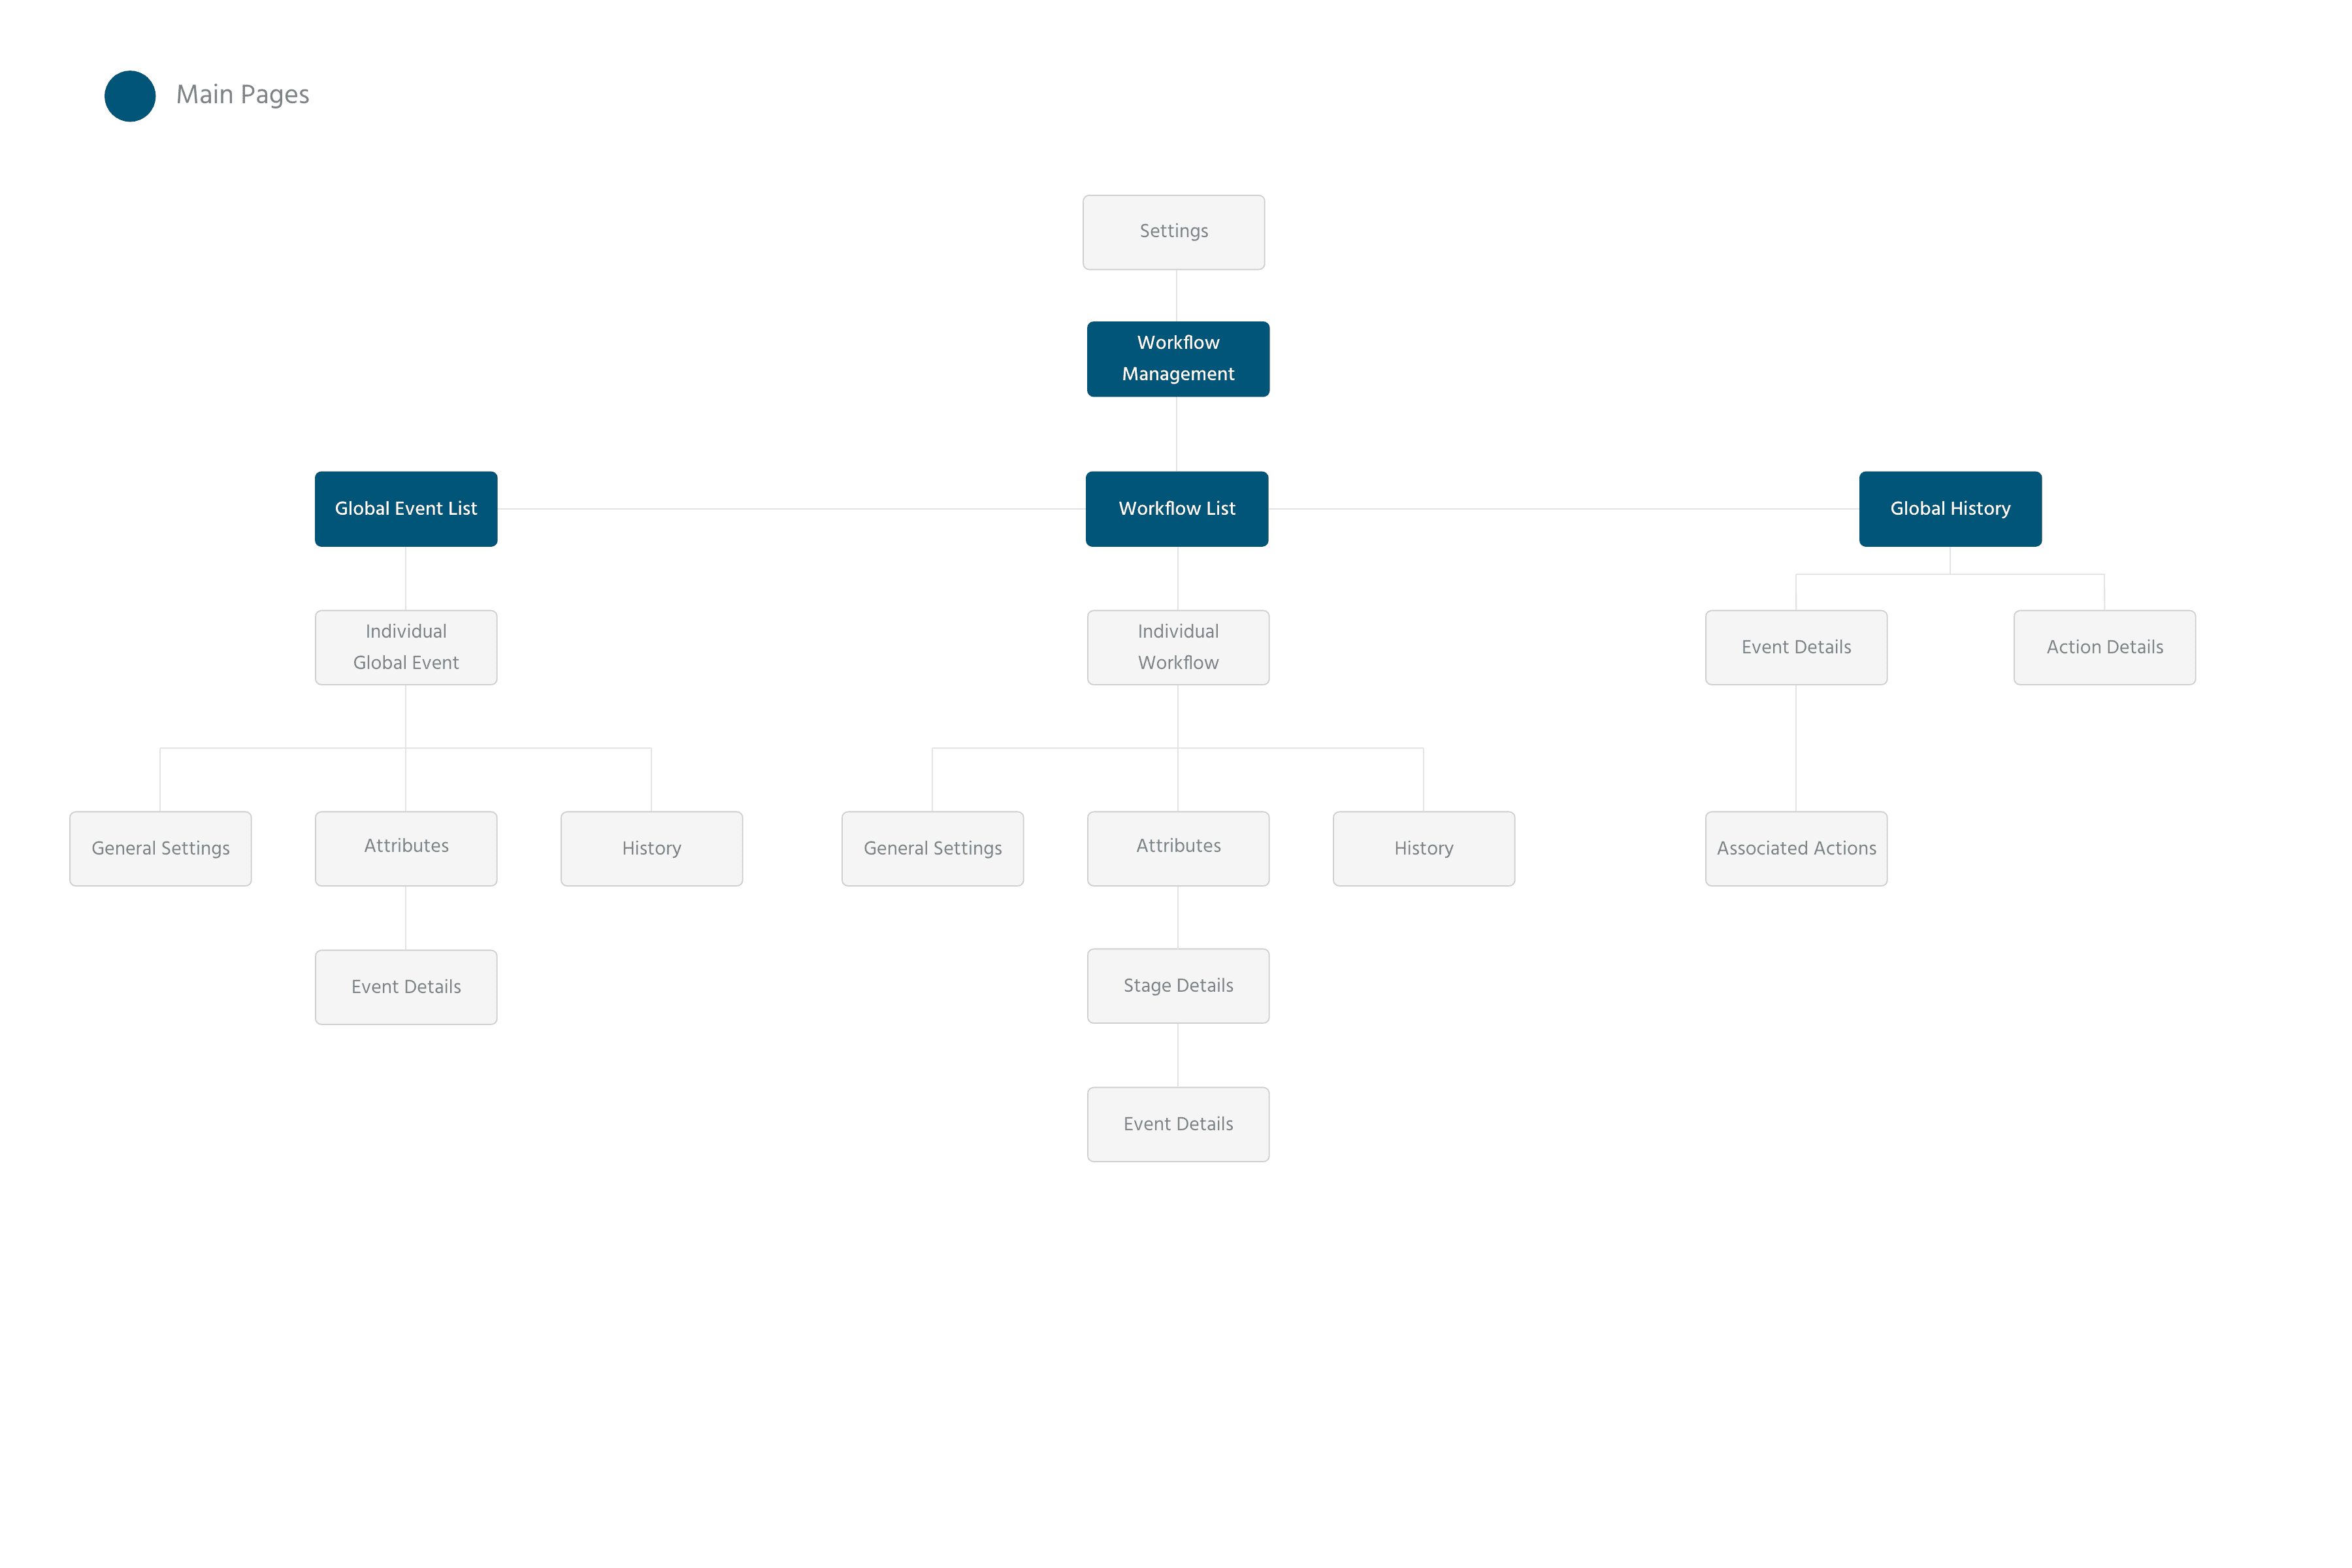
Workflow Management
Snapsheet — B2B SaaS — Web

Project Overview
Snapsheet is building a claims management system that could make a claim handlers’ process much easier and paperless. The system is a massive project that has automation integrated into most of its features. Knowing that this product could be delivered to any interested carrier, we had to create a product that would be configurable to ensure that insurance companies are able to set up processes that fit their own workflow.
Timeline: July 2019 – January 2020
Teammate: Rachel Riccardo (July 2019 – August 2019)
Role: UX/UI Designer, Information Architect
Tools: Sketch, Abstract, LucidChart
Solution
An admin-accessible section would be added to settings dedicated to Workflows. The section would allow users to complete the following tasks:
Configure workflows however they would like from start to finish.
Configure global events that would perform actions no matter the workflow.
View a history of how the workflow has impacted other parts of the system.
I was responsible for the design of configuration panels of workflows and global events. This enabled users to choose an event that triggers a workflow, set conditions, ideal actions, and workflow transitions. In addition, I designed the global history of all automation that takes place in the system. This gives technical users an environment to debug any automation errors that may arise during a claims process.
Research
Before jumping into designing our own solutions we took a look at how other products were handling automation. Two products that stood out were WorkflowGen and Freshsales. They both had solid solutions that could solve our problems.

Freshsales configuration page was very intuitive and easy to understand. It walked through the following flow: what action was the workflow for, when it should happen, what requirements must be met, and what actions should be performed. These features mostly lined up with what we were trying to achieve, but it only accounted for one single task.
WorkflowGen was more complex and it was clear that their audience was more tech-savvy. It used a BPMN style to create workflows. It was easy to see how everything was connected but most information was hidden behind different shapes. WorkflowGen displays the different stages a workflow could go through very well.
Although both products work great, for our intended users we needed to improve upon some of the features they created to fit our own needs. We saw that there was potential in both and created a product with concepts from both.
Initial Design

Before I started working on the configuration panels, we came up with initial mockups for the graph view. We decided that we would implement a similar stage system to WorkflowGen. Instead of applying it as a “who is now responsible for this” manner, we applied it in a way that shows all the events, actions, and transitions that will happen during specific stages. We also explored adding a drag and drop feature that contained BPMN styled symbols. The design of the graph view influenced the configuration panels’ design.

Final Design
Graph View
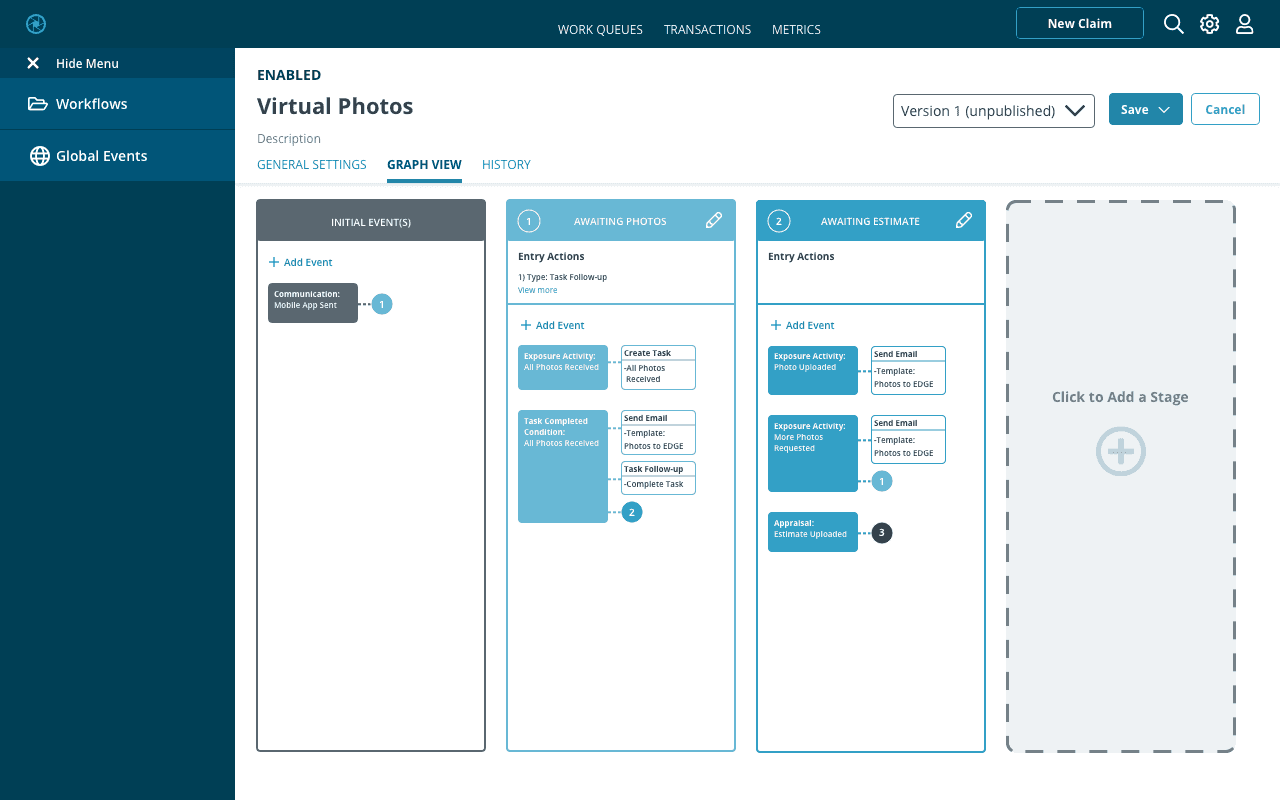


Big changes were made to the graph view which ultimately changed the design for the configuration panel. We got rid of the BPMN styled drag and drop to enable users who were unfamiliar with the standard. Workflow Management, in general, is a system that will need to be taught to the client, but we decided it would be best to design it more intuitively. Due to this removal, there was no longer a need to have a configuration panel for events, actions, and decisions. The user can now only configure stages, and events on the stages.
Inside of the events panel, the event name was modified to be a selectable predefined name in our database. Previously, the user was only able to set one event type and attribute. I changed this so that the user would be able to add as many as they want in the new “conditions” section. This change was important because different clients will want automation to best fit their process. To avoid human-error, it was decided that we would no longer allow users to place actions that weren’t linked to events. This is further explained in the global history section.
Global Events
One thing our design team valued was consistency. We would avoid creating new ways to do similar actions that we have designed previously. With this mindset, we made sure our users would not have to re-learn things. This is clear in Global Events. Global Events are events that happen no matter the workflow they are in. For example, anytime a claim is opened, the policyholder will receive an email. I made sure the Global Events page shared a similar design as the configuration panels in the Graph View.
Global History


Global history was a feature added specifically for debugging errors. It contains the history of all events and actions triggered by a workflow or global event. While designing, I made sure that it was easy to understand what went wrong. I added an error icon to drag the user’s eye to failed items. When clicking on the failed event, I provided the user with a list of all conditions that were used by the event both within itself and globally. The user is also able to see what actions were associated with the event. This information allows the user to go back into the workflow’s configuration panel and modify the conditions to avoid future failures.
Reflection
Working on Workflow Management was exciting. I was able to work directly with product managers, developers, and other designers to create this feature from the ground up. This product has evolved multiple times to ensure ease of use for our users. I especially enjoyed working on this feature because it had a huge impact on the overall application. I can’t wait to see how our users will interact with it.